Lately, I have been working on a very cool project: The Axion, an automated paint mixing machine.
I was very lucky to work with Panaxion, a start-up company based here in Montreal, on the manufacturing-prototype of their invention, the Axion. It consists of an automated on-the-fly paint-blender and paint-applicator.
The Axion?
-
-
The Axion
-

-
Control Panel
-

-
Rear Panel
-

-
Front
-

-
Vanity
-

-
In Italy
-

-
From Above
-

-
Paint Blender
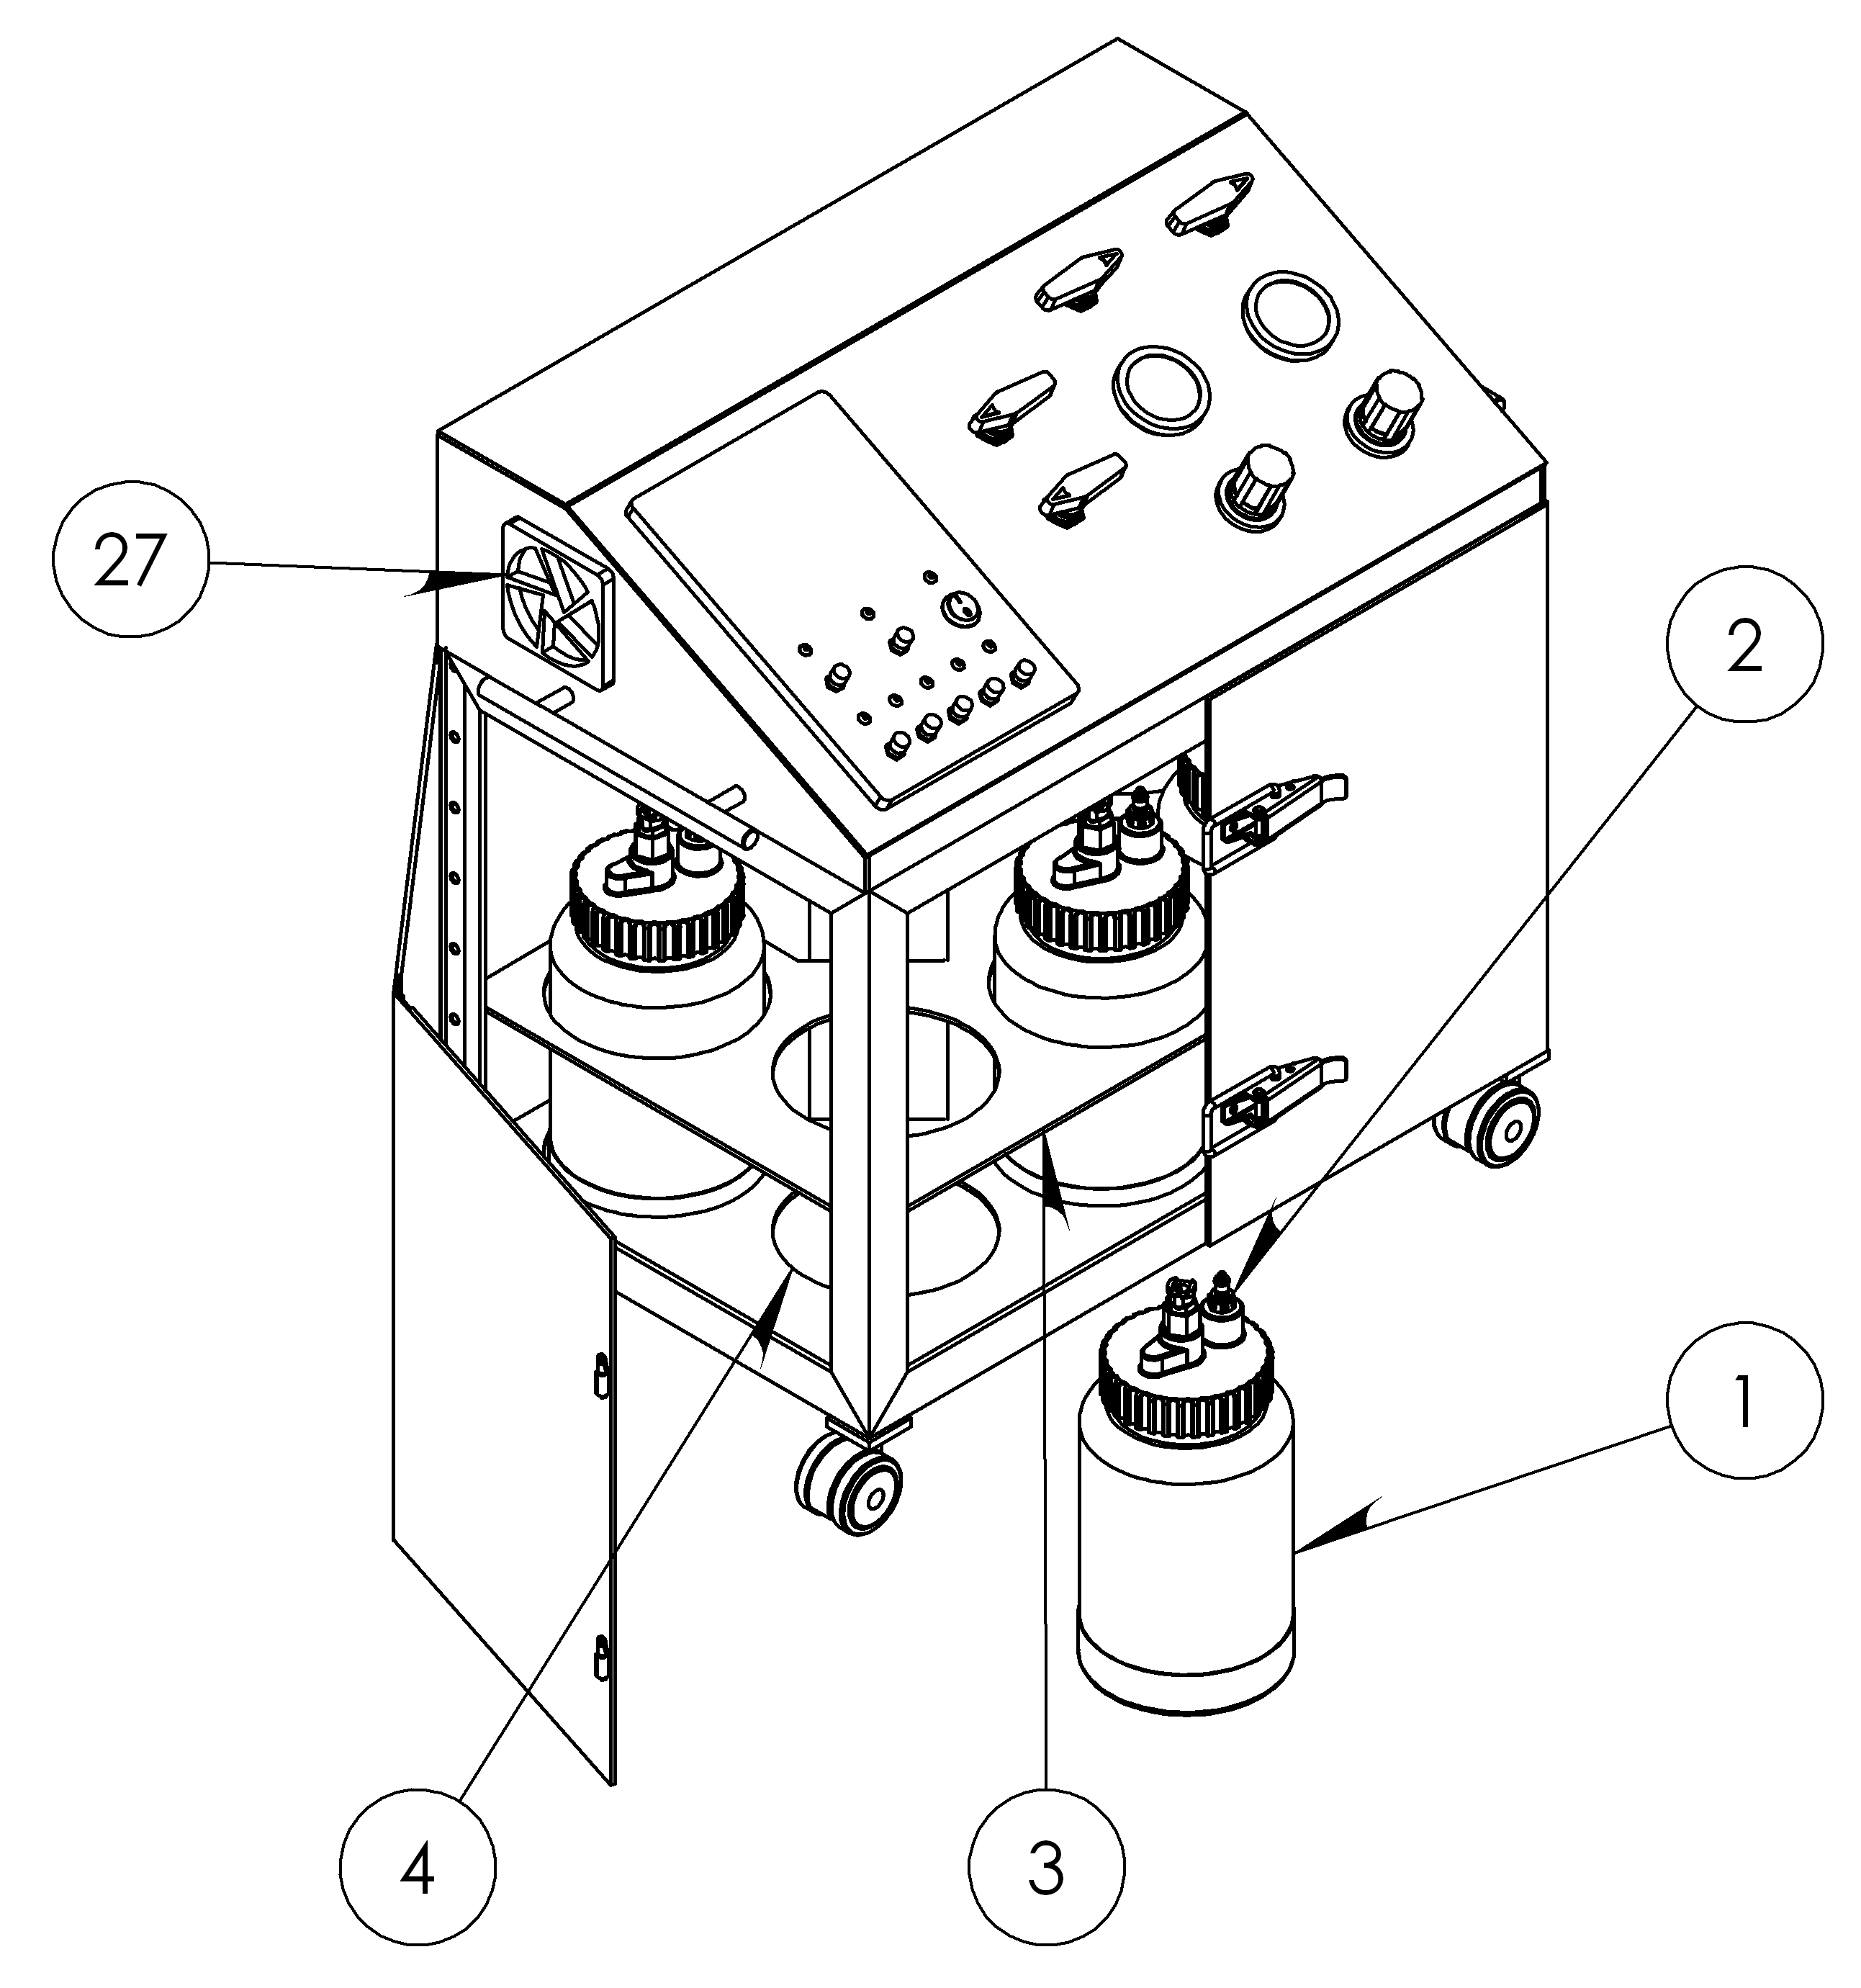
The Axion is a paint mixing device composed of five paint containers, a paint flow control system and a paint blending apparatus. The whole system is controlled by a PC. As you select a colour from a user-defined colour palette in the Coloraxion software, the machine dispenses the appropriate amounts of different colour paints in order to produce the desired blend.
The machine is rather ingenious and is going to make its debut in the professional decorative painting realm very soon (I’ll keep you posted on that).
My Involvement
I was involved in the mechanical and electrical design of the first manufacturing prototype. I was lucky enough to learn SolidWorks and draw the entire machine (up to the very last detail). The resulting 3D model was then used to build the actual prototype and to produce some multimedia material. Needless to say that I was very happy to participate in the construction.
| Title: |
The Axion |
| Description: |
Concept video based on the SolidWorks CAD model. |
Did you say start-up?
Panaxion is a start-up company and is soon going to manufacture Axions. Their website is under heavy construction at the moment but it should become stable (and beautiful) soon. If you are interested in decorative painting (in the non effeminate sense), I suggest you keep an eye on this project.
Project
I used the automated panoramic photography rig (or Panoramaker, for short) in order to make some panoramas here in Montreal.
After having the rig working, I went out on my bike with my tripod, my laptop, my digital camera and the panoramic photography ri. I decided I wanted to capture the sunset at Mount Royal but when I was halfway there, I noticed that the sun became completely covered by clouds. So I decided to shoot some other panoramas instead.
CCA
Here is a nice 360 deg view of the Maison Van-Horne Shaughnessi (a.k.a. The Canadian Centre for Architecture). This building is located here. Keep in mind that you can click on the title in order to see the panorama full-screen.
When watching carefully, it is possible to notice a little parallax error near the base of the descriptive plate in front of the building. I could have corrected this but I noticed it too late and I am extremely lazy. You can also see some cars blending with their surroundings as Hugin, the panorama stitching program, tries to make sense of a changing scene (with cars passing by).
Place Ville-Marie
This is a panorama of Place Ville-Marie taken at the central fountain.
| Title: |
Place Ville-Marie |
| Description: |
A 360 deg panorama shot at the Place Ville-Marie fountain. |
The parallax errors in this one are much more significant, but then again, laziness got the best of me. They are mainly caused by the fact that the camera was not perfectly flat on the tripod when shooting this.
If you want to know what are the tools used to create these panoramas, please read my previous posting on Making Panoramas.
Project
As promised before, here is the Python script that runs my panoramic camera hardware. It is a very quick prototype and is by no means intended for widespread use since it requires manual calibration. Nevertheless, it might be very useful to those seeking to learn how to position the servos or control a digital camera through Python.
This script requires my Pololu library and includes some codes from here in order to control the camera. Besides the basic requirements of lib_pololu, the script also requires gPhoto. If you are running Linux, you most likely already have it but in case you do not, you can install it through your favourite package manager or by using the console (e.g. for Ubuntu/Debian):
sudo apt-get install gphoto
If you are using some other OS, you can download gPhoto from here.
The Code
Download
# Adding the path to the lib_pololu.py file to your modules path.
# Assuming that the file is at /your/path/to/the/library/lib_pololu.py
import sys
sys.
path.
append(‘/your/path/to/the/library’)
# Import the lib_pololu module
import lib_pololu
# Import the serial communication and time modules
import serial
import time
# Open serial port
port = serial.Serial(‘/dev/ttyUSB1′)
port.baudrate=2400 #set an appropriate baudrate
# Camera Code (from vmlaker.org)
import os, re
from subprocess import call, Popen, PIPE
def run(command):
print ‘Running:’, command
p = Popen(command, shell=True, stdout=PIPE)
lines = p.stdout.readlines()
for line in lines:
print ‘Stdout :’, line,
return lines
def capture():
c = ‘gphoto2 -capture-image’
sout = run(c)
firstLine = sout[0]
expr = ‘New file is in location (.*?) on the camera’
comp = re.compile(expr, re.DOTALL)
path = re.findall(comp, firstLine)[0]
dir, fname = os.path.split(path)
c = ‘gphoto2 -get-file %s -folder %s’%(fname, dir)
run(c)
c = ‘gphoto2 -delete-file %s -folder %s’%(fname, dir)
run(c)
c = ‘gphoto2 -storage-info’
run(c)
# Calibration Parameters
# These parameters set the limits and reference positions of the rig.
# They have been obtained trough trial and error.
horizontal = 93.5
front = 95.5
back_l = 84.5
back_r = 107
top = 70
bottom = 110
# Create two motors
# There are associated to the panning and tilting motion of the rig.
tilt = lib_pololu.Servo(port, 0, 1150, 4650)
pan = lib_pololu.Servo(port, 1, 1200, 4987)
# Define a capture routine
# This is a simple loop that takes pictures in order to produce a
# 360 deg panorama.
def capture_pano():
# Capture parameters
steps_h = 16
steps_v = 4
step_h = (back_r - back_l)/steps_h
step_v = (bottom - top)/steps_v
pos_v = bottom
while (pos_v >=top):
tilt.set_pos(pos_v)
pos_v = pos_v - step_v
pos_h = back_l
while(pos_h <= back_r):
pan.set_pos(pos_h)
pos_h = pos_h + step_h
time.sleep(2)
capture()
# Initialize the motors
tilt.set_pos(horizontal)
pan.set_pos(front)
time.sleep(2)
# Capture the panorama
capture_pano()
Again, many thanks to RobotShop who provided the hardware that made this project possible.
Project, Robotics, Software


