The Wind Turbine Part 3: Building the Generator
- May 18th, 2010
- Posted in My Projects
- By Carlitos
- Write comment
Once all the parts were built, assembling the generator was a simple task since it was designed to require only a Flat Screw driver (although a Robertson could also help) and some talent. The most difficult part was to prop up the mast so the wind turbine could catch some actual wind.
The Location
We decided to install the turbine on the side of a decommissioned chimney. This place seemed ideal since it was higher than the rest of the house, and was sturdy enough to hold the turbine without any trouble whatsoever. No traces of the chimney remain inside the house since it was completely shut off by a wall.
This location was chosen at night and seemed ideal at the time but it hid a dark and terrible secret, as we found out the next morning: it was the home for an immense bee colony (that went all the way down the chimney).

The infamous chimney
The Battle for the Chimney
When we first announced to the Ecuadorians that we thought the bees had to be eliminated, they did not agree with us and suggested they would block the chimney hole during the night (when the bees are asleep) so that they would be temporarily trapped there until the work is completed. Until its execution, the plan seemed reasonable, humane, and rather smart. Unfortunately, the Ecuadorians decided to block the hole with some old rags that were not effective at all. The only result achieved by this was to upset the bees by making it very difficult (and frustrating) for them to get in and out of their colony. In the most courageous way, we (Tiberiu and I) removed the bee infested cloth blocking the chimney as illustrated in the video below.
The solution to this problem was simple enough and it involved fire and ninjas. First, the ninja part (since the fire part is sort of obvious) : I decided that having a ninja mask and glasses would be an impenetrable protection for the face against the bees. I remembered that someone in Youtube showed how to do a ninja mask from a t-shirt and I used that Youtube-earned skill to make my own. Besides the mask, using long pants, a jacket and gloves was enough to cover the rest of my body.

Ninja Wannabe vs. Bees
Once protected, we could set fire to the chimney (from the top obviously since the bottom was shut off as stated earlier) and get rid of the bees. It is important to note that the bees did not like the fire and came out slightly angry. Luckily, the smoke disoriented and even stun them quite effectively. It was a long combat and I got stung (only) once, but, in the end, we vanquished the vicious vermin.

Victorious Ninja Wanabees
This method and our outfit was much more effective and comfortable than the Ecuadorian alternative depicted below. This is by no means mockery and is intended to prevent people from putting garbage bags over their heads.

Ecuadorian Bee Protection
With the way cleared, it was straight forward to install the mast by bolting it to the chimney with custom made metal brackets.
Mounting the Mast
The brackets cost around 5$ and were custom made from a piece of steel by a local Blacksmith in around 2 hours.

Blacksmith Boy and Carlitos
Five brackets with two bolts each hold the mast to the wall of the chimney. This otherwise simple task took several hours since the quality of the bolts, the wall, and the tools was less (much less) than optimal. Thank you Nicolas for diligently bolting the brackets!
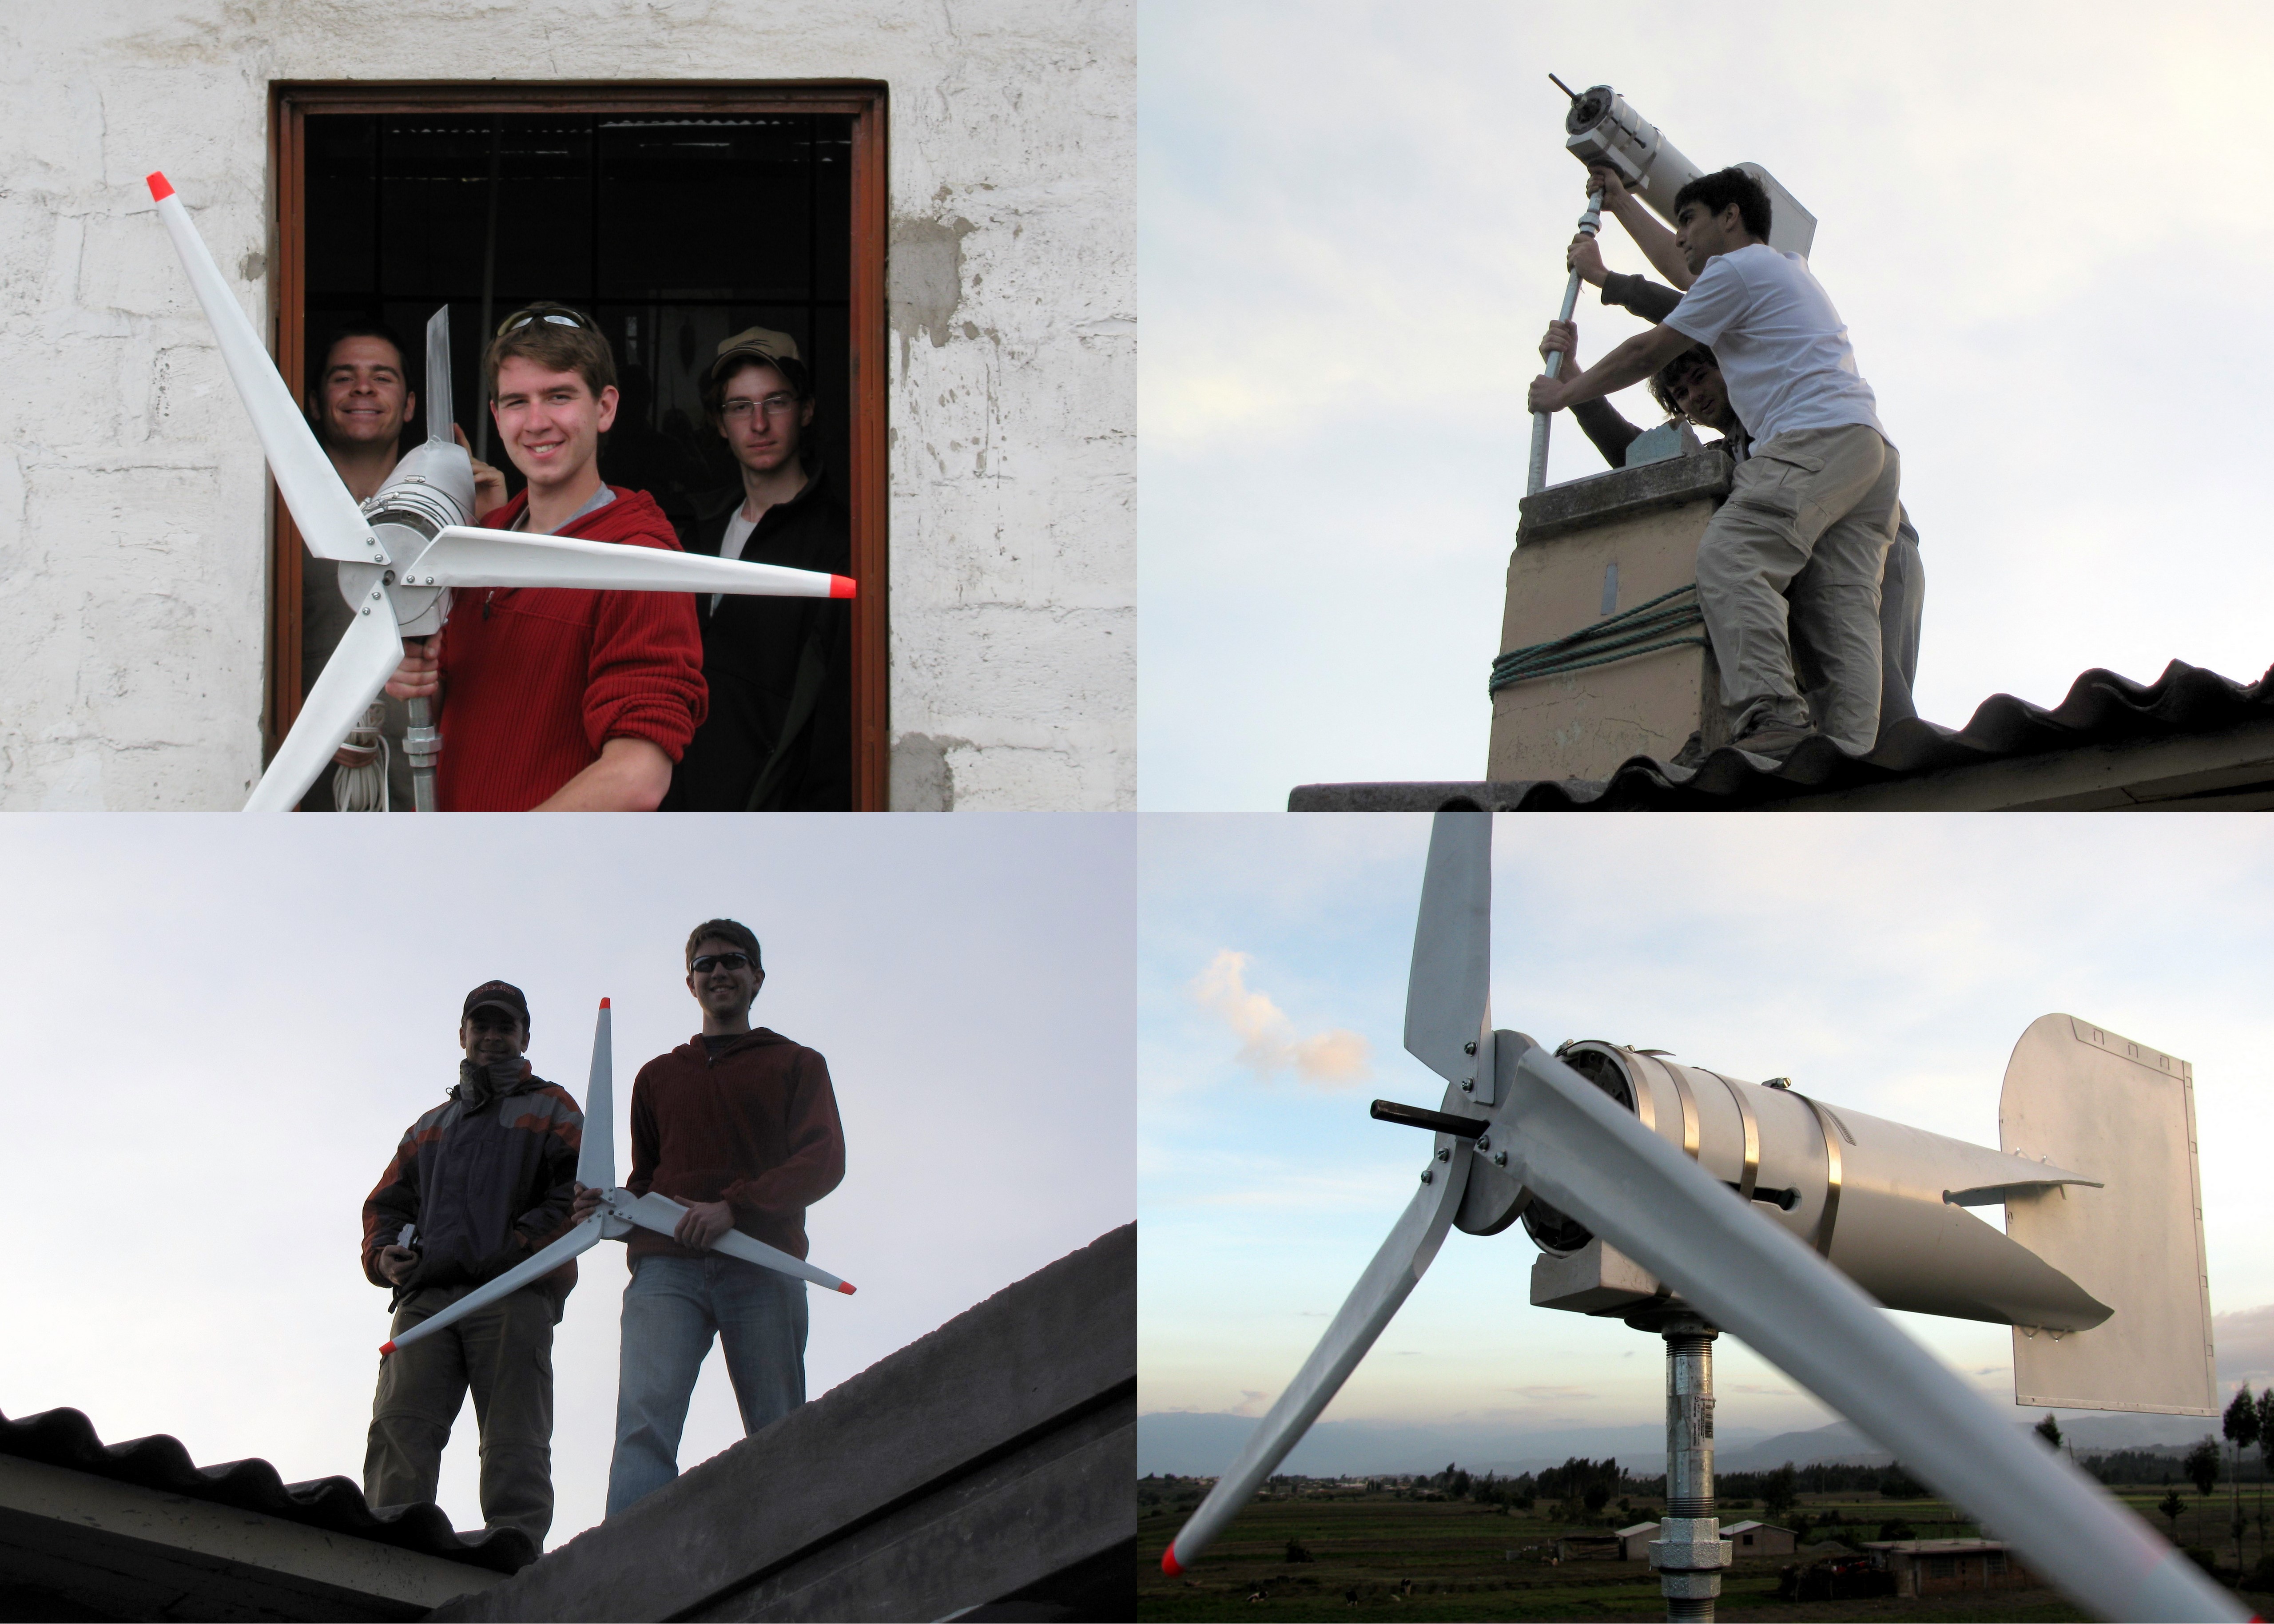
Assembling the wind Turbine
As stated before, all the parts for the IBee Turbine were made previous to the trip Canada, partly at Mr. Plante (Geneviève’s father)workshop and partly in my workshop.
Below, you can see the parts in their final stage being weighted and prepared for packaging. This happened the night before I left and I kept working on the parts until pretty much the very last minute.

IBee Turbine Parts
Once in Ecuador, I put together some (quite instructive) instruction so the students could assemble the turbine on their own since the first morning of construction I had to go finish buying the required materials for the projects to a nearby town. It turned out that I was back on time in order to assist with the construction, which was actually very good since my single sheet of scribbled instructions was not all that instructive.

Turbine Instructions
The turbine (generator and body) is mainly held together by stainless steel 8″ and 10″ pipe clamps. The tail is held with heavy duty cable ties, and the blades are bolted to a beautiful custom-machined flywheel held to the rotor shaft by two setscrews. The turbine is held to the mast by a pipe-flange, a wooden support, and wood-screws.

IBee Turbine Assembled
The generator is connected to a charger and a car battery through a two conductor exterior cable that is fed trough the mast and goes through the flange, the wooden support, and the body. It is also important to note that the blades must be balanced so the turbine does not oscillate (or wobble) when hit by the wind. Finally, making sure that the pivoting point is at the turbine’s centre of mass is crucial since it allows the turbine to be easily oriented by the wind direction. As depicted below, this can be done by suspending the turbine from a thread and shift it until it is balanced.

Centre of Mass
Mounting the wind Turbine
Adam brought then the turbine to the chimney, and Angelo and I installed it in its final location. It was a great relief to find out that the brackets were holding the mast tightly to the wall and that the turbine could stay securely there for many years to come (hopefully).
Minor adjustments were done when installing the blades in order to achieve perfect balance for the turbine. Since the rotor shaft is particularly long and that the centre of gravity was calculated with the blades at the middle of the shaft, this was particularly easy since we had lots of room to reposition the blades along the shaft.
It was a great satisfaction and relief for all of us to see the turbine finally in place and running smoothly.

The IB Group 2010, Carlitos, and the IBee Turbine
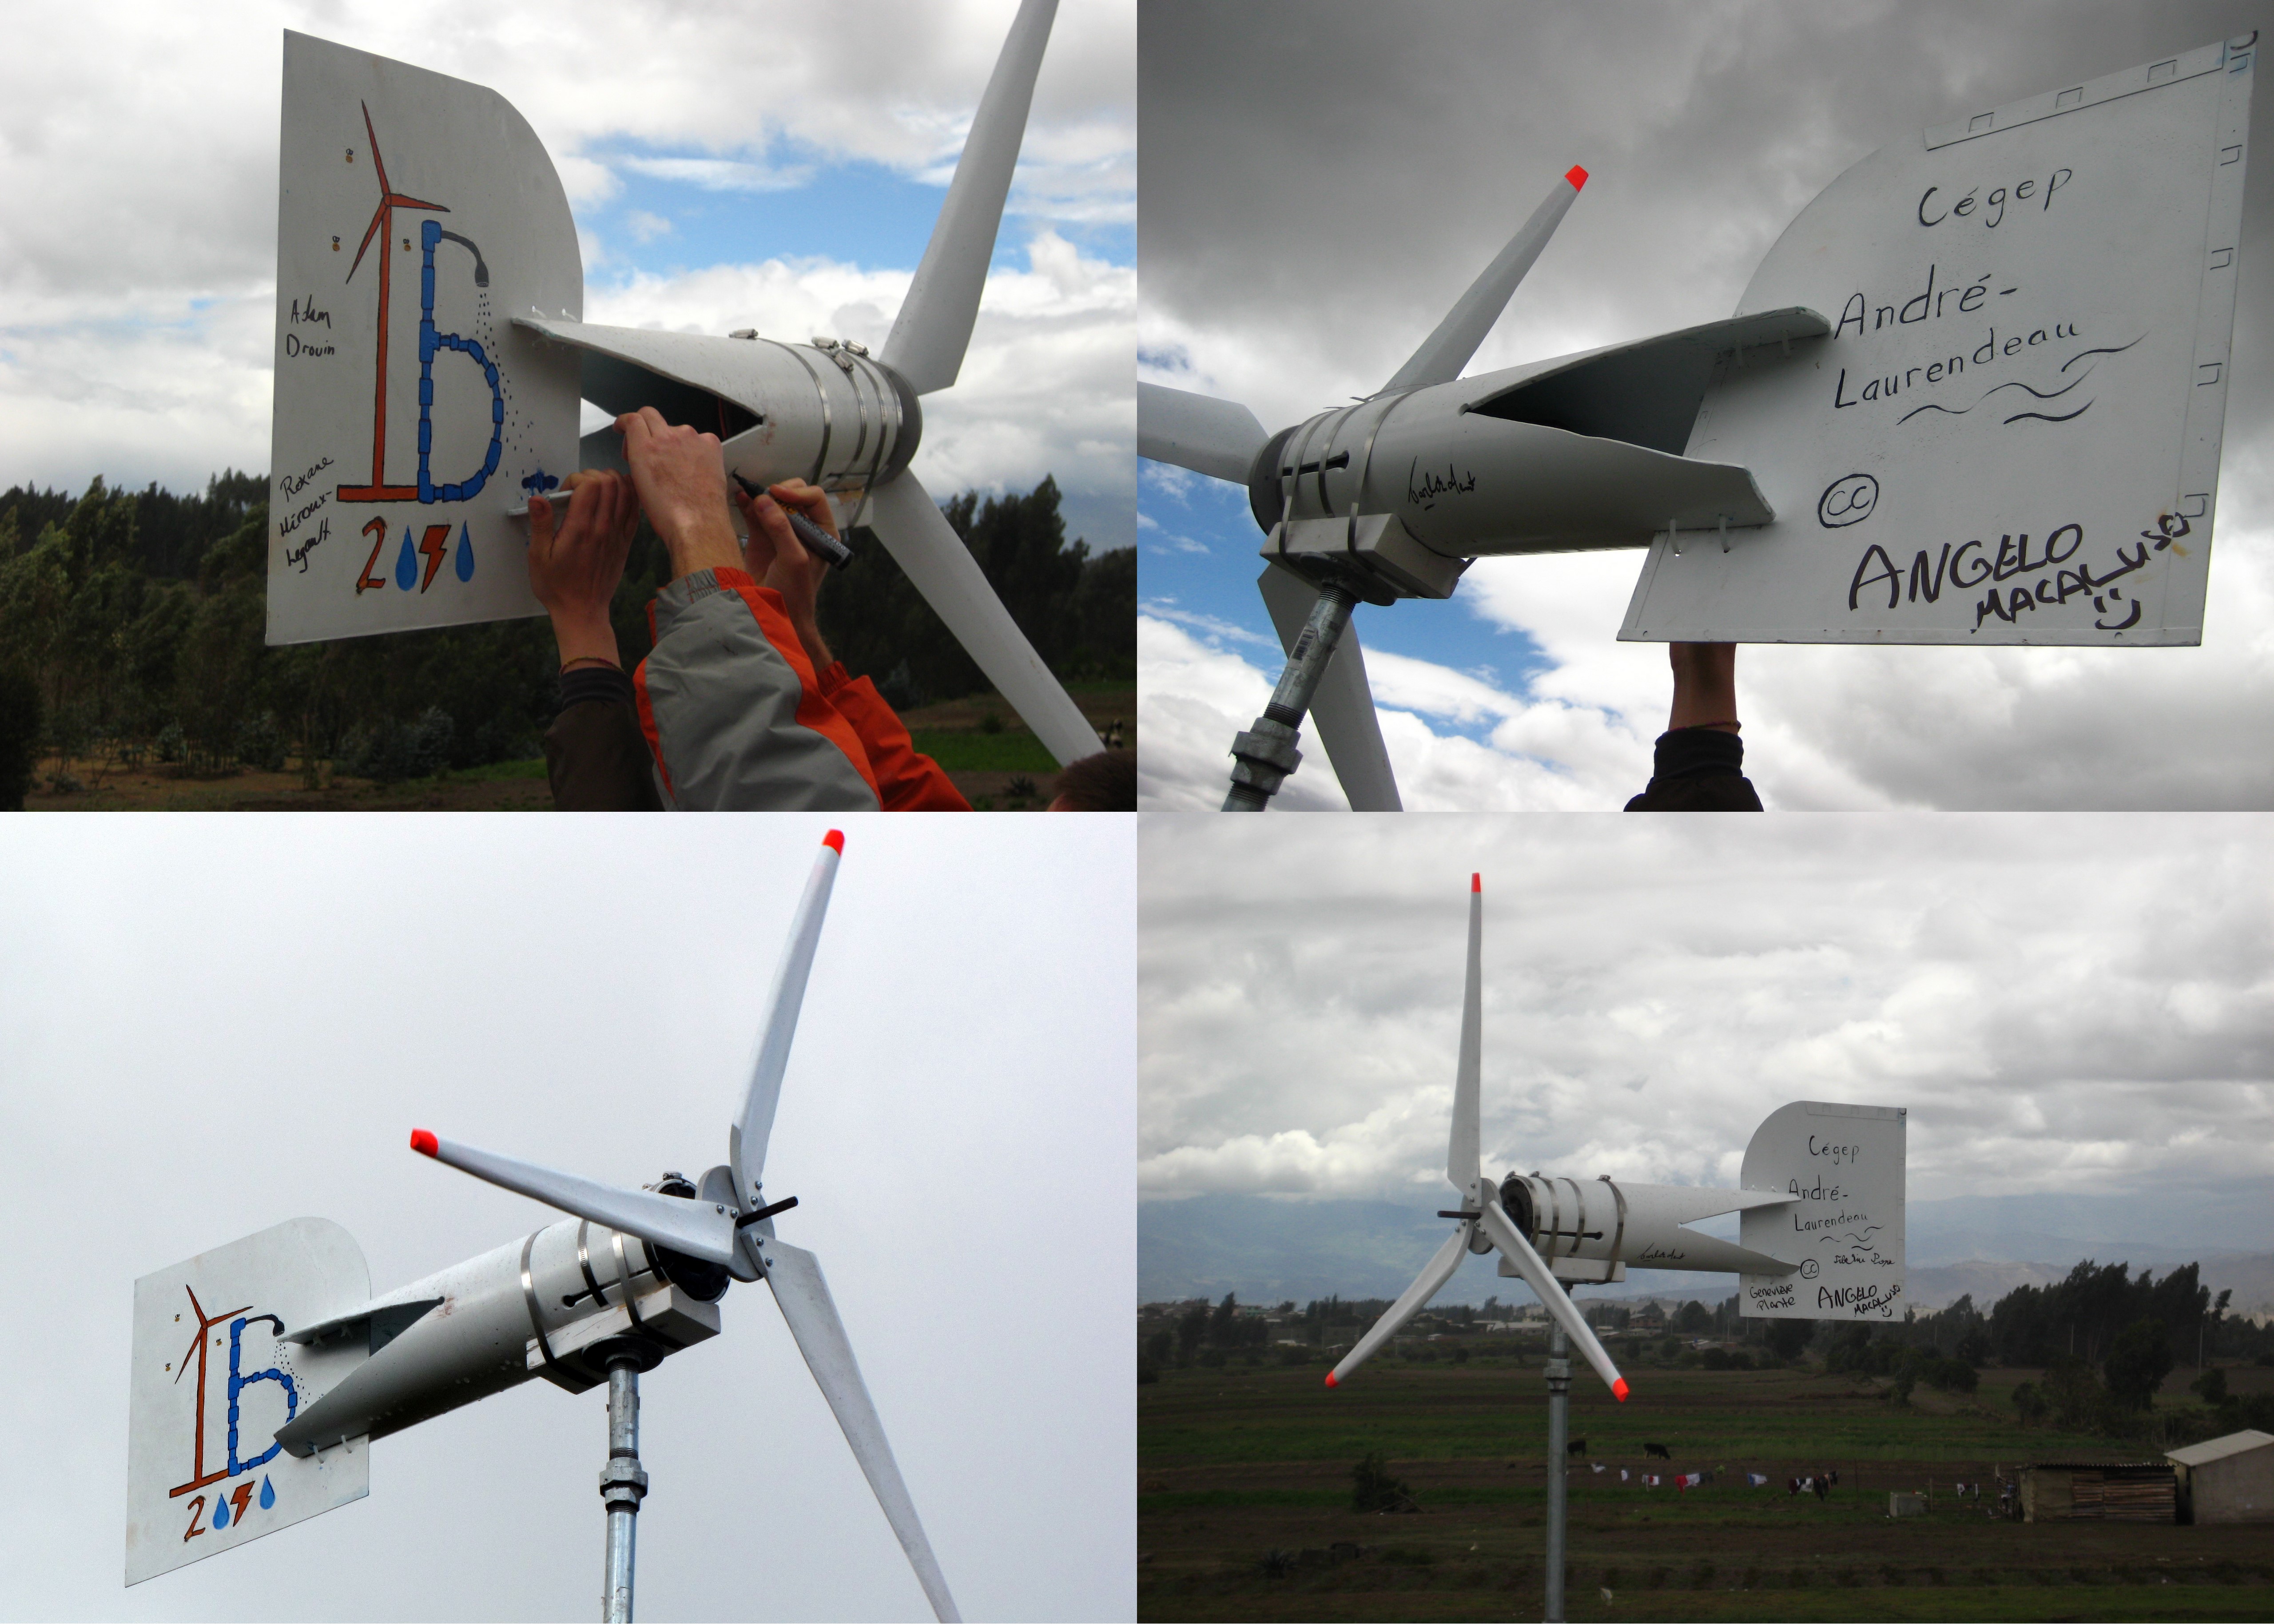
And some decoration later…
Pay close attention to the quite ingenious IB logo done by the quite imaginative Roxane (the shower part will be explained soon).


No comments yet.